


thirdstone
-
Posts
288 -
Joined
-
Last visited
Content Type
Profiles
News and Information
Tutorials
Product Reviews
Supplier Listings
Articles
Guitar Of The Month
Links and Resources
Forums
Gallery
Downloads
Posts posted by thirdstone
-
-
The neck angle is 2 deg and sits up a few mm. The angle is on the neck tenon.
The pick up is a vintage vibe, I chose that one as P 90's are a bit noisy electricaly and these ones are shielded around the coil. It is supposed to make them quieter with out resorting to a humbucking design like the P100. As an added plus you can change the magnets as they come with alnico and ceramic mags.
They are also a bit hotter than stock , around 10%.
-
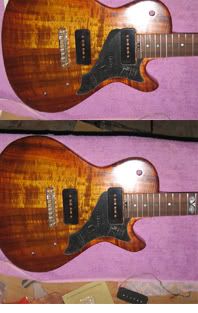
The aim of this guitar is to recreate a Gibson les Paul Jr single cut single P90.
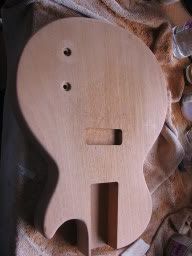
The body shape I have concluded to be basicly a LP with out the cap. This results in a slab of Mahogany 47mm thick. The neck join will be full width tenon like the original however I have extended the teck tenon further into the body. It will still be covered by the pickguard. I did intend to recreate the original exactly but I can't help doing things a little differently.
I plan to do a sunburst but it could change to TV yellow.
I have not recorded every step as it is quite time consuming but this is the first pic
The body is a two piece brazilian mahogany.
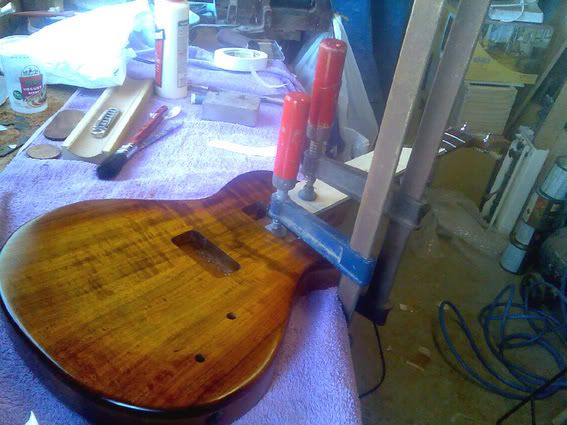
To get the righ tone of yellow in the burst I am going to bleach the body face with rustins wood bleach. I did some trials and this is the result.bleach trial
-
Okay I tried bleaching some mahogany with Rustins wood bleach and this is the result.
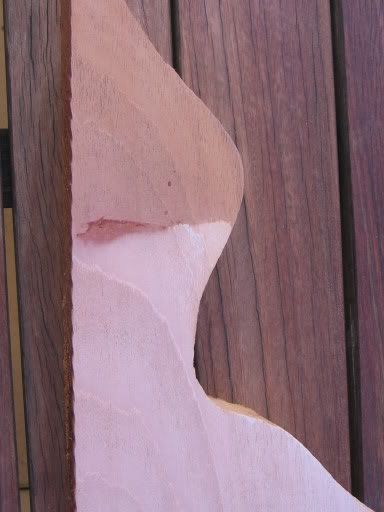
I think it will do the trick..
-
I have used it for a cap on a mahogany body LP JR type guitar (Blackwood Lp Jr ) as it looks great but tone wise I think its pretty similar to Mahogany. Its used alot in acoustic sides and backs and also its used for Wiesenbourne (however you spell it) slide guitars. Gilet guitars in Sydney use it quite a bit in acoustics....Kev
-
I don't know if mixing the different finish styles is going to work but if you do mix them then I would grain fill the oiled part for sure.
On the neck you can stain and oil no problems , I have done it. Just watch out if you use an oil based stain, you will have to wait until the stain is completly dry before oiling it. say wait a couple of days . What happens is that the oil will disolve the stain and pull it off as you wipe n the oil. best method is to spray on the oil. If you can't do that then wipe it on lightly for the first coat. If you use a water based stain then no problems at all.
-
I hve found a product that might work. Its Rustins wood bleach .I`ll try it and let you know. I doubt if Gibson did it this way but I can't think of any other way.
-
Its an early 50's LP Jr and it is Mahogany for sure
-
Hi Guys I am having trouble working out how to get the brighter yellow part of the burst on mahogany.
It seems to me that the wood needs to be lightened or bleeched in order to get the light tone.
So far I have been unable to bleech the wood. I am trying hydrochloric acid on a test piece at the moment.
Any answers welcome.
Thanks

-
looks good. if you are gonna leave the neck unbound i would be inclined to leave the headstock un bound.
You could bind the neck with an off cut of the fretboard wood so as to give the look of an unbound neck but have the class andfeel of a bound neck.
-
Looking good guys, Setch the heel looks good . Similar to PRS but I think yours is a bit better as it has more support in the cut out. How thick is the body? one photo looks very thick , with enough for a carved top the smaller photo looks more like the normal 46mm.
Wez your tennon looks great but whats the chanel for? Truss rod adjustment??
-
I`m toying with the idea of extending the neck tennon into the area covered by the pickguard or even further into the bridge pup area so the pup sits on it. Have you thought of doing that?
I think that's the way Mattia does his --I think his tenon goes all the way to the bridge itself?
But the wood I'm using isn't long enough for that-- I have enough to extend the tenon about 6 cm past the end of the fretboard...the LP Jr guard I have is 7 cm wide at that point, so it'll be hidden.
I'm going with the longer tenon because the neck joint is a double-cutaway design and I don't want the fretboard to go into the body, so there's not much wood surrounding the neck where the fretboard ends. I'm sure I can get away with a shorter tenon (and I'm thinking of shortening by 10 mm or so), but the blank I made up happens to be this long.
Oh I didn't realise that you were doing a double cut, in that case its normal to extend into the body. Infact its imperative you do that for neck stability.
-
Next time I will maintain the fretboard lines through to the end of the tennon.
Yep, that's how I did it --it made more sense to me that the tenon should taper out...but I'm using a pickguard, so there's no problem.
I still haven't decided which way to go--do the body or the neck. Since I'm going with a single pickup, that's less of an issue. I'm leaning toward the angled pocket because I'm also thinking of going with a long-tenon bolt-on (using inserts).
For what its worth I think the neck is more critical to get right so I make that first then get the body to fit the neck. You can make small adjustments on the body but not the neck. As for the angle it realy doen`t matter alot which way you go. The differance is minimal.
Just a thought, the Gibson LP Jr neck stops at the end of the fretboard It dosn`t extend ito the pup area if there was one. I am sure you know this. My next project will be another LP Jr single cut single pup,but this time it will be more of a replica. I`m toying with the idea of extending the neck tennon into the area covered by the pickguard or even further into the bridge pup area so the pup sits on it. Have you thought of doing that?
Kev
-
Thirdstone...when you added the angle to the tenon--did you do that only to the tenon, or did you cut it in along the entire blank?
It was made after the neck was rough cut out. I had a thick piece of wood for the neck blank that allowed me to keep some meat at thet area. I simply marked out a 2 deg angle(after calculating the depth) and cut that with a band saw and then cleaned it up with a plane.
The reason I chose to put the angle on the neck and not in the pocket is that the tennon gets thicker towards the end rather than thinner if the angle was in the pocket. This I thought would slightly increase the strength of the neck and hopefully make for better tone. Also if the angle was in the pocket the end of the tennon under the pup would be quite thin after the pup rout.
One thing that did cause a problem that I didn't mention is that I cut the neck with the normal shape but I chose to stop the increasing width at the point that the fret board ends. From this point I went parellel to the center line . I didn't think it would be hard to do. It was difficult because the transition point where it goes parellel was tricky match up and keep it tight at the same time. Next time I will maintain the fretboard lines through to the end of the tennon.
I hope that makes sense
Kev
-
Very very nice.
IMO the square heel looks very out of place in this otherwise curvy guitar. I would have made it follow the contour of the body.
Other than that it looks sweet! keep up the good work!
Yeah I agree but I will leave it as is as it dosn`t get in the way. I might do it later but now I just want to play it.

-
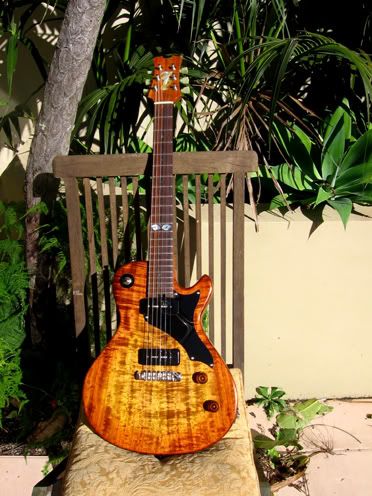
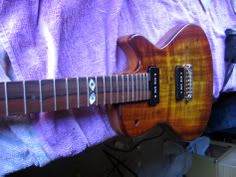
Finally its finished, Without wanting to sound biased its good. Very good infact. I am very pleased with it. The Lollar pup’s are very musical not at all over the top. I was able to play this guitar side by side with a 50’s LP special double cut.To my ears mine had a sweeter tone ,with more upper mids and a smooth top end compared with the chimmy mids slightly harsh top end.of the older guitar.
Thats just the bridge pup. The neck pup sounds great real fluty with a piano like honk and the combined is very useful. Combined they are supposed to be hum canciling but it don't seem to make much differance.
Some Guitars I have made have been quite narrow focused in their use but this is one of those guitars that does everything except for the extreme styles.
So what went right and what could have been done better
The good....
The general construction went smoothly with no major mistakes.
The decision to make the neck first and make the body to fit was good.
Putting the neck angle on the neck tenon was also good.
The body wasn’t cut out until later; this allowed a more stable area for the router when I did the neck pocket. Much better than routing the pocket after cutting out the body.
I made up a neck binding with some off cuts from the fretboard; this gave me an inconspicuous bound neck. Not my idea but a good one all the same.
An oil based stain was used on the burst which proved to be super easy to apply. The secret being to use very little stain keeping the application rag quite dry. Locking in the stain by spraying on an oil based sealer was the trick to stoping the oil finish from pulling out the stain pigment.
What caused problems......
The finish was done twice due to the first burst not being contrasty enough.
It still could have been a bit stronger but I am happy with it as it is.
I wated until it was time to fit the bridge before I drilled the post holes, this wasn’t necessary in fact it may have made it a bit harder as I had to be careful marking out the hole locations.
Oil finish on the neck is great, On the body I think its not quite so good. Ultimately I need to find a better method. Something other than Nitro that gives a thin hard coat. On the plus side the oil finish is incredibly easy to fix up minor damage. If your guitar is for home only then the oil will be okay , If you are going to gig it then nitro or similar would be needed .
Stew Mac recommends the tone pro posts with the pigtail bridge, whilst they work the fit could be closer .
I forgot to put the side dots on. They are on now but it was a hassle.
The guitar looked too woody with out the scratch plate so it got fitted. I think it adds interest apart from protecting the guitar from errant picks.
I didn’t know that P90’s were so electrically noisy , I have got it to noisy strat levels but I intend to star ground it and apply shielding paint in the pup cavities as per guitar nuts web site.
Thanks for all the intrest, I'll try and get some sound clips linked if I can work out how.
-
Yep full width tenon, Just rout the slot and drop the neck right in. Put the angle on the neck tenon and your laughing. Another thing of intrest that I was not aware of is the there is no extension of the neck tenon past the fretbord. Ie no extended tenon into where what would be the neck pup area if ther was one (which the LP Jr don't have.).A bit Like a strat neck glued in .I didn't realise this untill I saw a 57 LP Jr with out the scratch plate fitted. You could, of course extend the neck into this covered area. Would it improve tone? LP Jr sound fine without it .
Very early LP jr had the pup closer to the bridge. I think this was changed around 57-58.
-
Thanks people
To summerise then; Wrap around bridge fitted LP Jr has neck angle around 1deg to less than 2 deg , the later LP Jr and specials with tuneomatic / stop tail the neck angle must be increased to around 4deg.
Body thickness FROM BEAUTY OF THE BURST BOOK for the mahogany bit on a Les Paul STD is 43mm and Setch gives LP Jr as 46.03mm.
The outline is the same except that there is a 1/4" bit of body wood along the treble side of the neck in the cutaway forming the neck pocket.
Thanks all..Kev
-
Thanks guys , No this question is because my son has asked me to make a vintage correct 57 LP jr sunburst single cut . I guess the controling factor for the neck angle would be the bridge hight. As for the shape , again I thought it would be the same as the LP std but again not 100% sure. Body thickness I guess at 44mm, 1 13/16 = 46mm so that would be about right, Thanks again.
I have donated so as to use the download stuff so I hope to find some usefull outlines there.
...Kev -
thanks guys I thought the body shape was the same however after playing a custom shop 58 reissue I suspect the neck angle is more than 2 deg . maybe upto 4.
-
Q1 Does anyone know if the 57 Les Paul Jr (single cut ) body outline is the same as a std Gibson Les Paul?
Q2 what is the neck angle of a Les Paul Jr?
Q3 What is the body thickness of the Les Paul Jr?
Thanks in advance for any answers.
Cheers ....Kev
-
No scratchplate! That guitar is gagging for the absolute minimum of furniture on top - 2 knobs, a toggle, and 2 P90s is plenty.
UHM See I didn't put a scratch plate on my last one , When it was new it looked realy good but after a year the pick damage aint pretty. Also the pick guard adds to the LP Jr vibe.
-
Thanks for the kind comments
Decision time.
Small or large scratch plate????
The bridge pup might have a dog ear cover what do you think.
-
How about trying a water based stain after the grain filling then oil on top, or leave the grain open for that raw wood look I think that would work well.
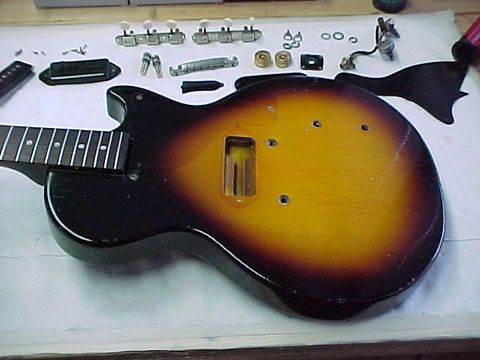
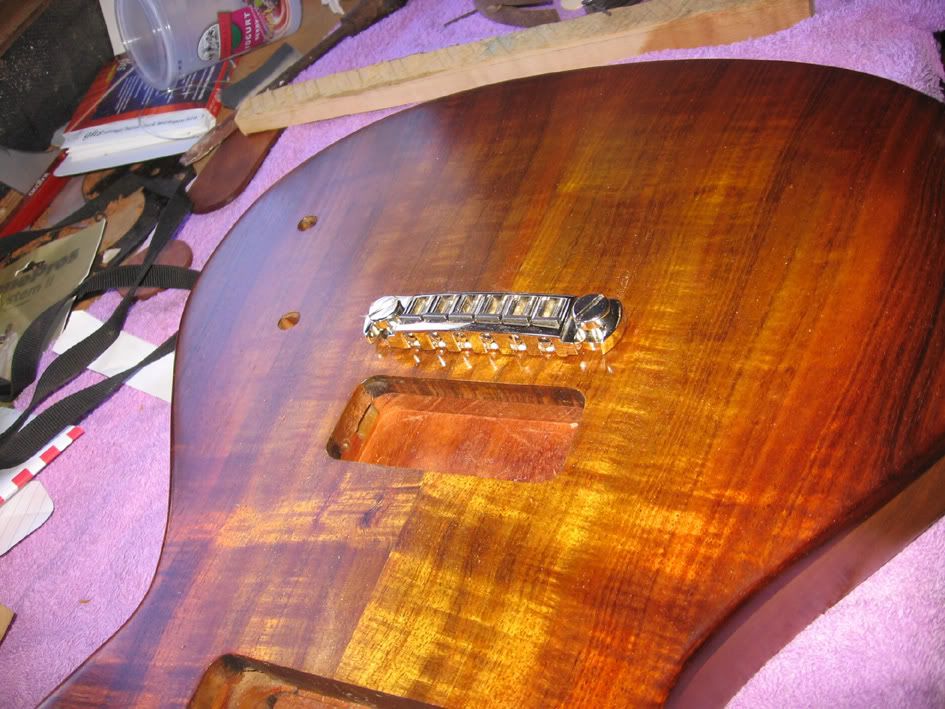
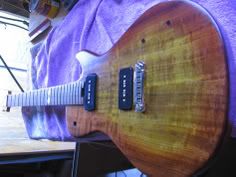
The bridge is now fitted
and the P90's are test fitted, not yet wired up.
-
I have been busy behind the sceens with the cavity covers finished and the final oil coats put on the body.
Now for joining the two bits of wood to create a guitar.
First i have a little ritual to perform. At this point I like to put some soul into the guitar.
this is done by adding a bit of DNA.
After that little bit of pain it is time to make a guitar.
Next is to fit the bridge..


Another Ls Paul Jr
in In Progress and Finished Work
Posted
Wez do you mean humbucker as in side by side coils?? SD make them this way in thir custom shop but they are very expensive.
I have the neck 90% finished. I have actualy cheeted a bit as I made the neck first. Its the standard fair , splice headstock mahogany wood, rosewood fretboard, 12" radius,ebony plate on the headstock.
One twist is that I bound the fretboard with ebony strips. I prefer bound necks and I was going to bind it with rosewood but I had the ebony and I thought it might look cool with the burst.
bound neck
One indulgance was that I bought (my wife bought ) a real gibson MOP inlay. I don't want to start another debate as to the morals of doing this so to anyone against this , Its done -get over it ,nobody with any sence will think this is a real Gibson. This guitar will never be sold in my lifetime. After that I don't care.
Headstock
Side view of neck showing trussrod adjustment at body end.
neck